How to measure, export & upload, via WJA USB App or upload to all monitors at the same time via our new "one click" WJA Ethernet App, your SoundID Reference room calibration profile to the Wayne Jones Audio Studio Monitors.
N.B. The WJA Ethernet App, for uploading SoundID Reference room calibration profile via network, is only available and suitable for multichannel monitor configurations. May also be requested with made to order purchases, for those who plan to upgrade to a multichannel system in the future. Other systems will utilize the WJA USB App.
Test your audio (example for 2.0 configuration, same applies for multichannel):
- With the monitors off, please connect the left & right audio outputs of your interface to the left & right XLR inputs of the monitors

(click images to enlarge)
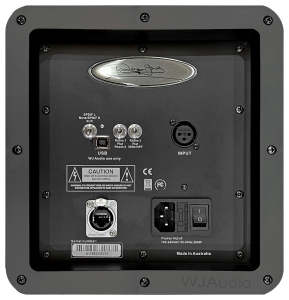
(with Ethernet port for multichannel configurations)
- Position the Input switch to XLR (down position in photo) & position the other room switches to the centre position (flat)
- IMPORTANT: Make sure the output volume level on your audio interface is turned down
- Power on your Wayne Jones Audio monitors & check that you have audio when connected
- Wayne Jones Audio Monitors DSP internal audio output sample rate is 192kHz 24 bit
- You can set your audio interface output to any sample rate up to 192kHz
- Wayne Jones Audio recommend sample rates of 96kHz or 192kHz
- Now you are good to start


Download & install SoundID Reference for Speakers & Headphones to your computer.
https://www.sonarworks.com/soundid-reference/download

The activation key is in the SoundID Reference package that comes with the Wayne Jones Audio Monitors.
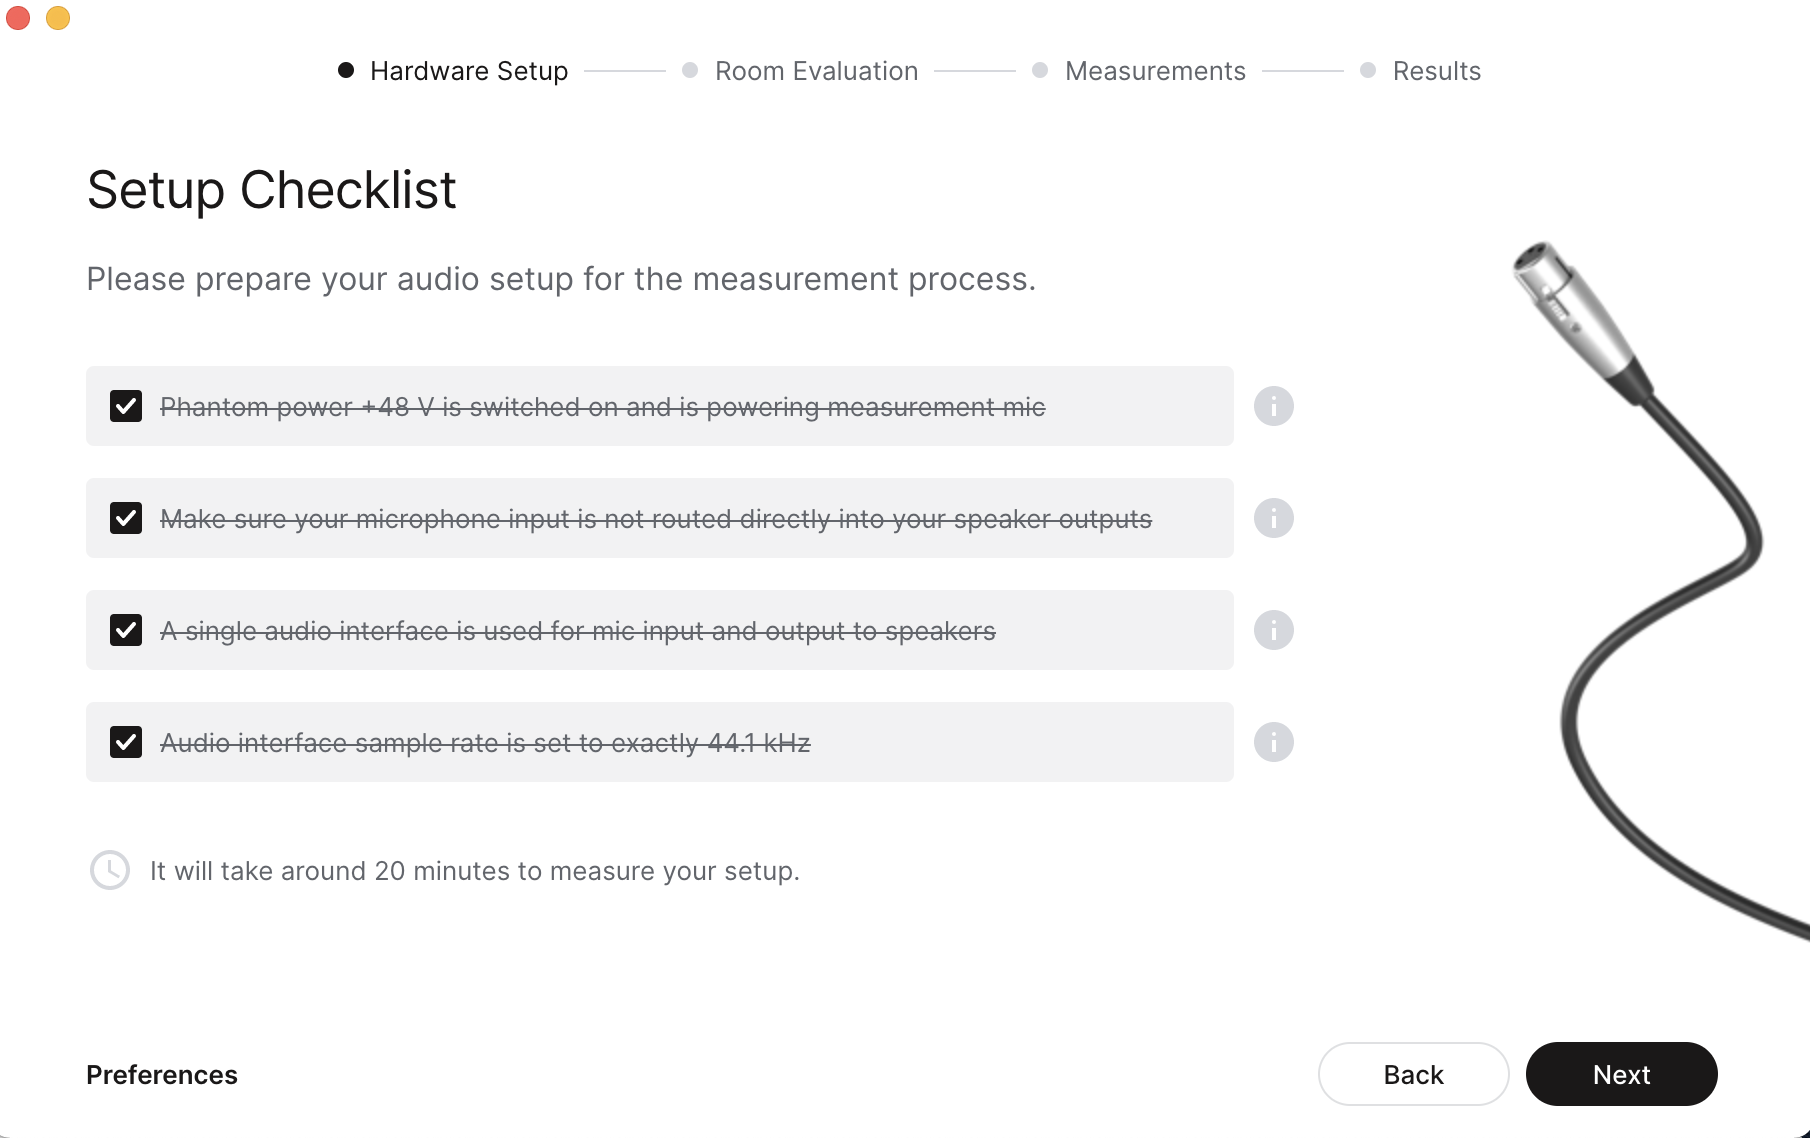
- Open the SoundID Reference Measure app


!!!Critical whilst doing any measurement!!!!!
- As you face the monitor set the input switch to the right for XLR input
- Set Room 1 & 2 and Room 3 & HPF switches to the centre (flat) position. This is the system flat response
Open SoundID Reference measure app & follow the prompts (when prompted select your configuration, 2.0 to 9.1.6)

- At the end of the completed measurement name your profile & launch the SoundID Reference application when prompted
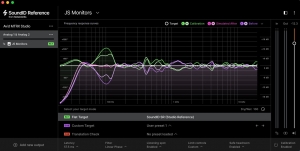
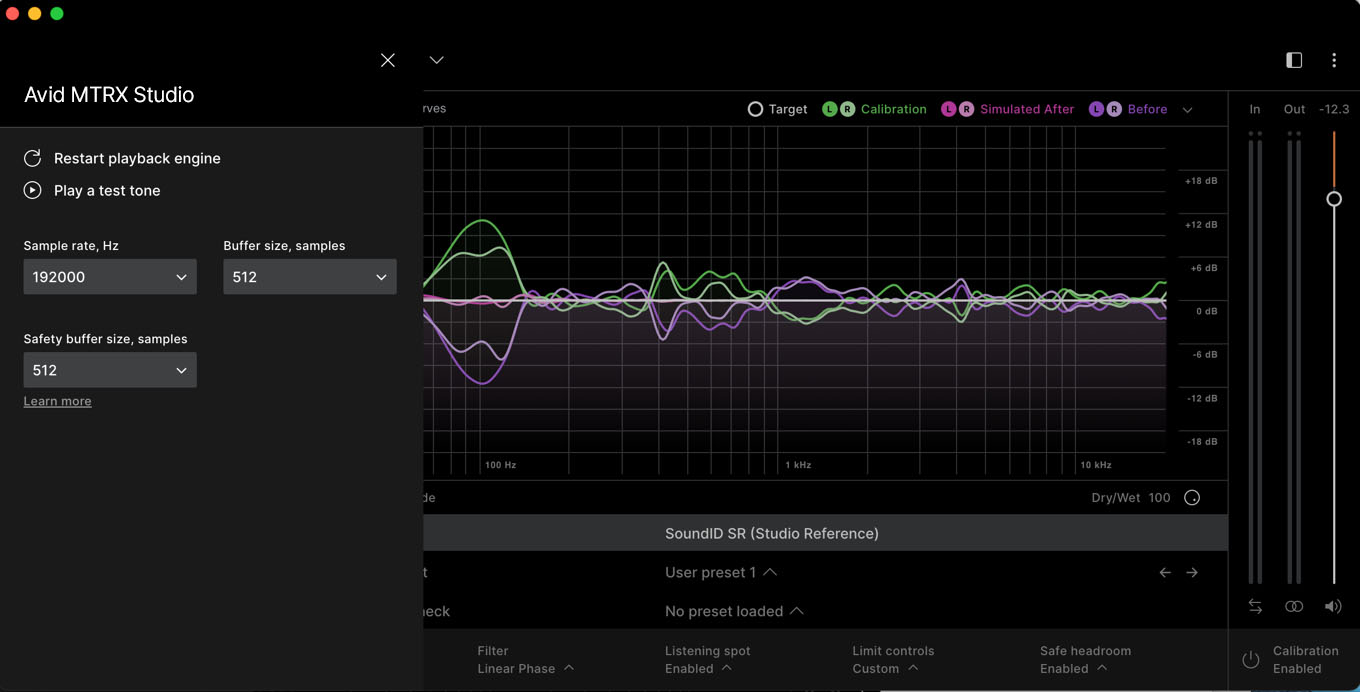
- Configure the SoundID Reference app audio outputs to match your interface
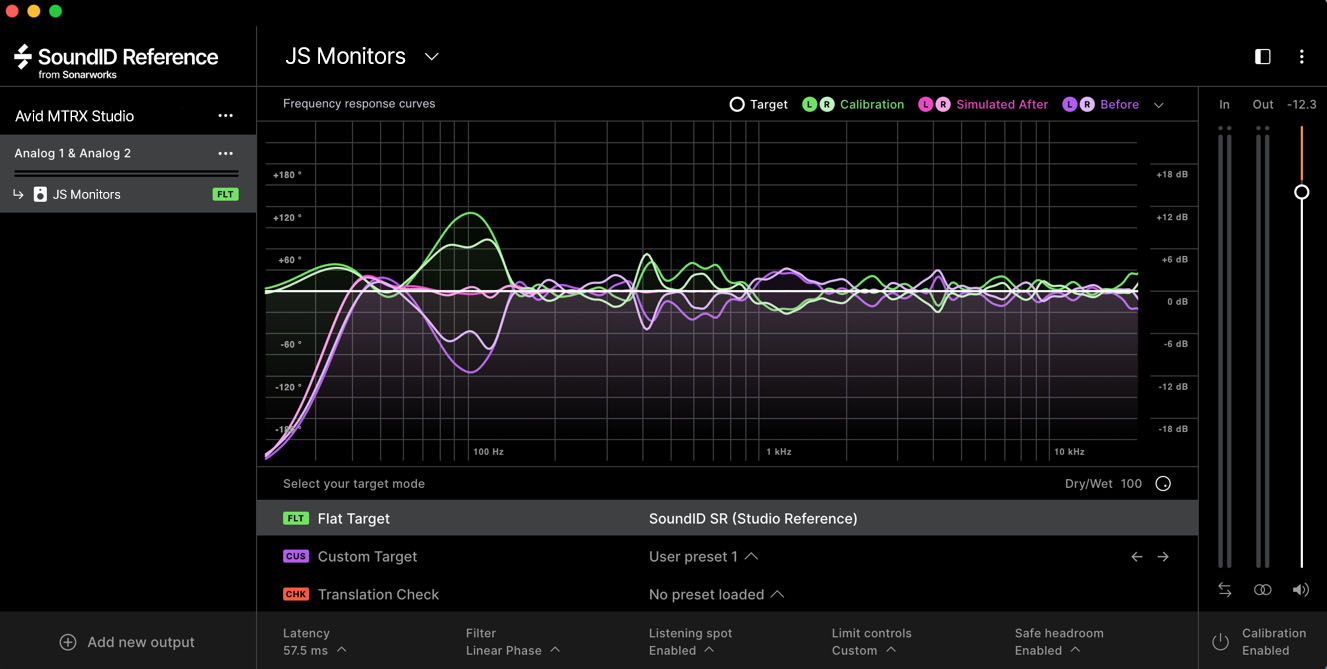
For the SoundID Reference app settings (along the bottom of the app)
Wayne Jones Audio recommend the following settings be used
- Flat target SoundID SR (Studio Reference)

- Filter set to zero latency
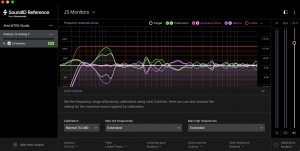
- Listening spot enabled (this exports gain and delay parameters, essential for multichannel time alignment)
- Limit Controls, Maximum low frequencies and Maximum high frequencies set to Extended (this gives you the full frequency range of your measurement). These settings will be transferred to your export files
- Safe Headroom, set to enable
- Set Calibration to enabled


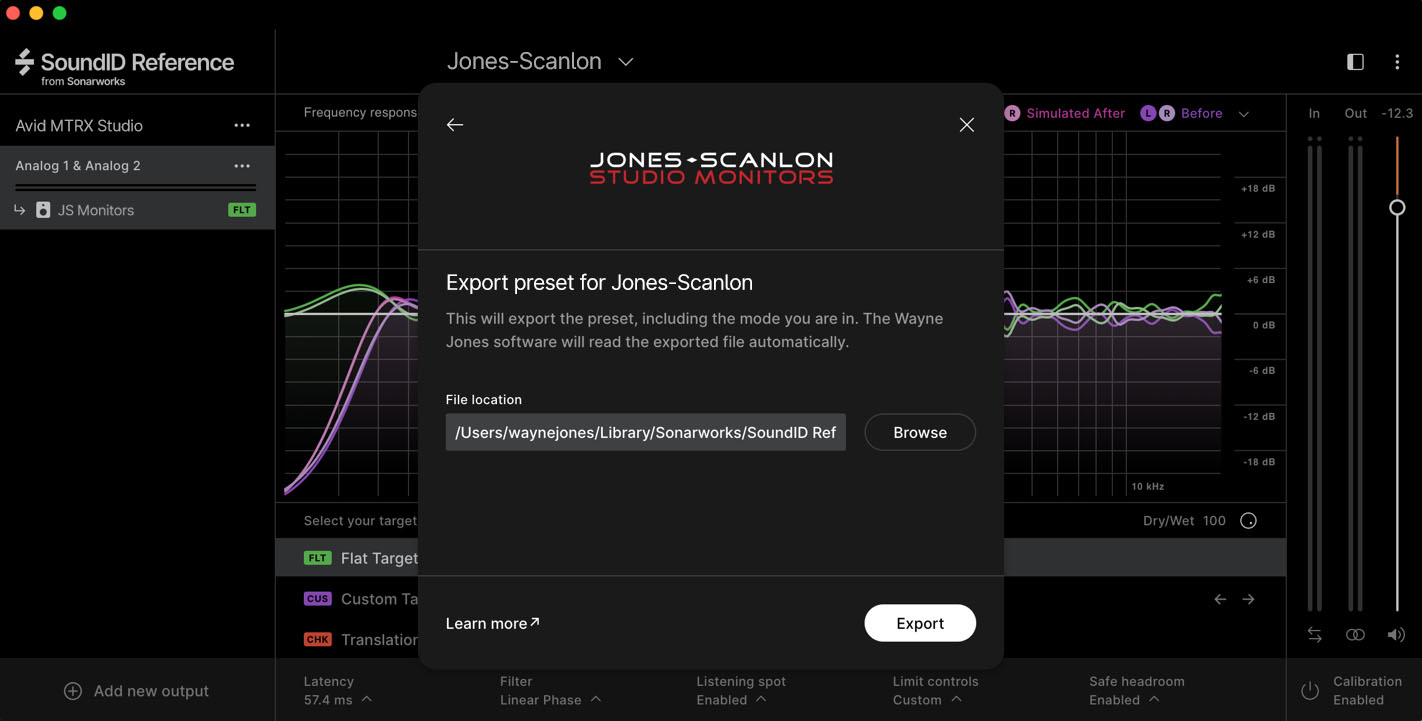
Export your profile
You now need to export your profile where it will be converted into left & right or multichannel binary files (bin files). These files are needed for the upload process to the Wayne Jones Audio monitors.
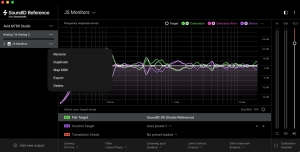
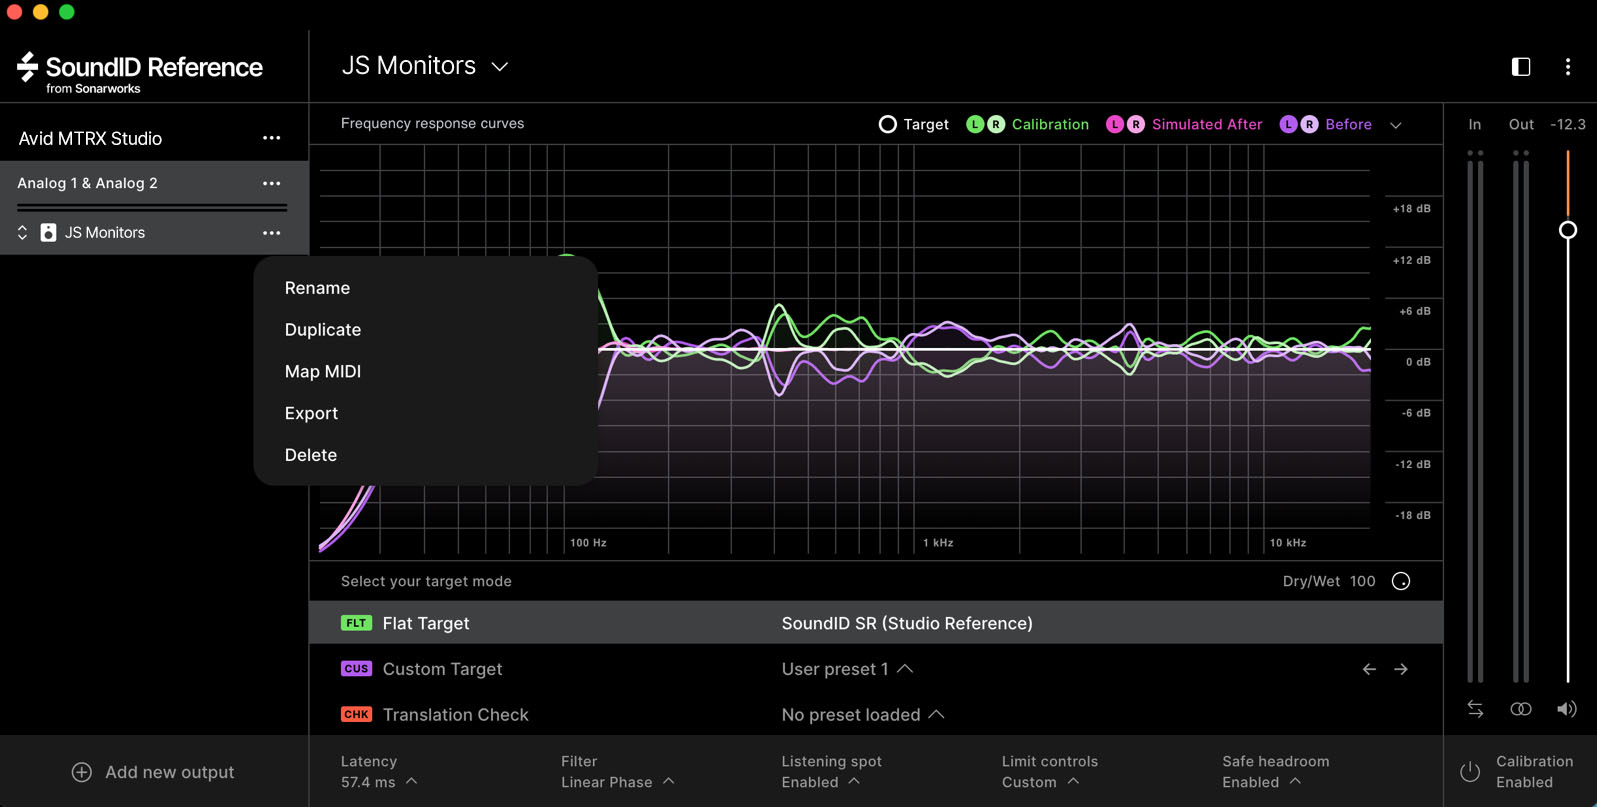
- Go to your preset name which is located in the left hand column of the SoundID Reference app
- Hover over the green FLT text, then click on the 3 dots that appear
- In the dropdown box please click export
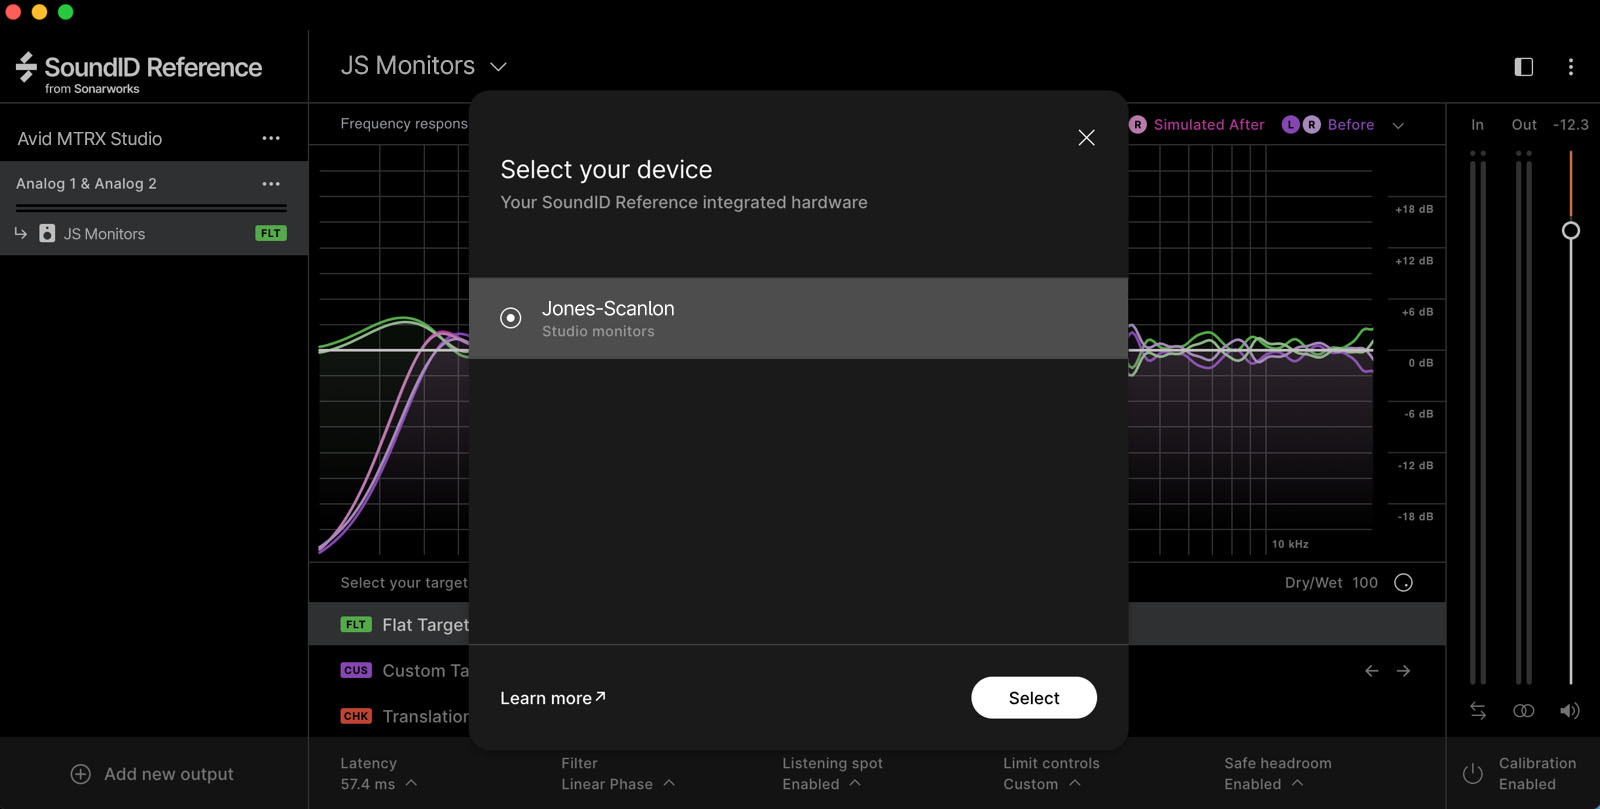
- A panel will appear please select Wayne Jones Audio for export

- Please note a dropdown box will show where your bin files will be sent
- You can browse & select another destination if you prefer
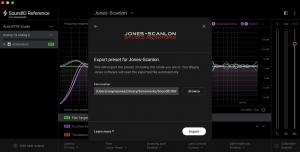
- You can browse & select another destination if you prefer
- Please click “Export”
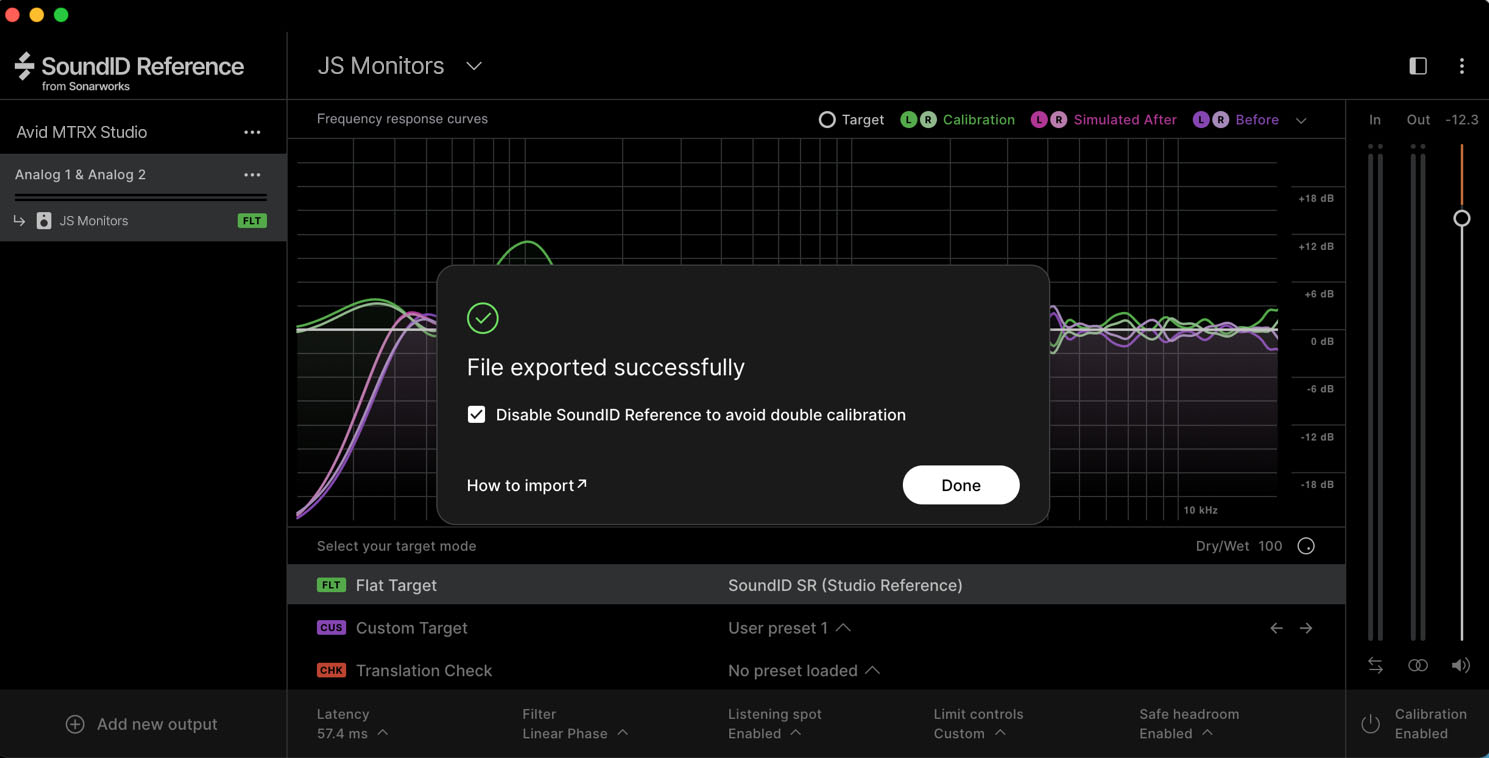
- Your files have been exported
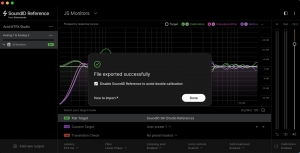
- Confirm the files are visible in the designated location
- Quit SoundID Reference app
Uploading To Monitors with WJA App
These instructions are the same for uploading 2.0 up to 9.1.6 multichannel bin files (example provided is for 2.0)
Requirements:
- Windows based PC running up to & Including Windows 10 & 11 (You can also use an Intel Mac running Parallels. Mac M1 is not supported.)
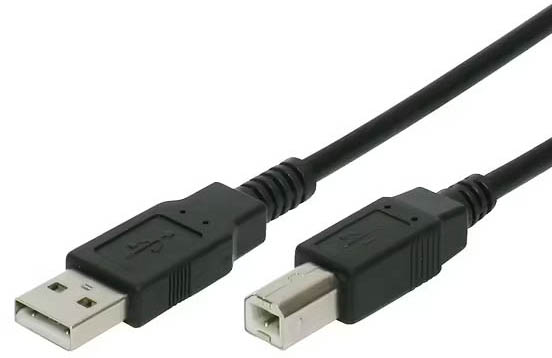
- USB 2 Cable for connection to the speakers
WJA SoundID Reference Upload App (USB) Instructions
Contact Wayne Jones for a password to be able to download the app from the website:
Go to the website shop & download the WJA app.
 Install the app on your Windows based computer
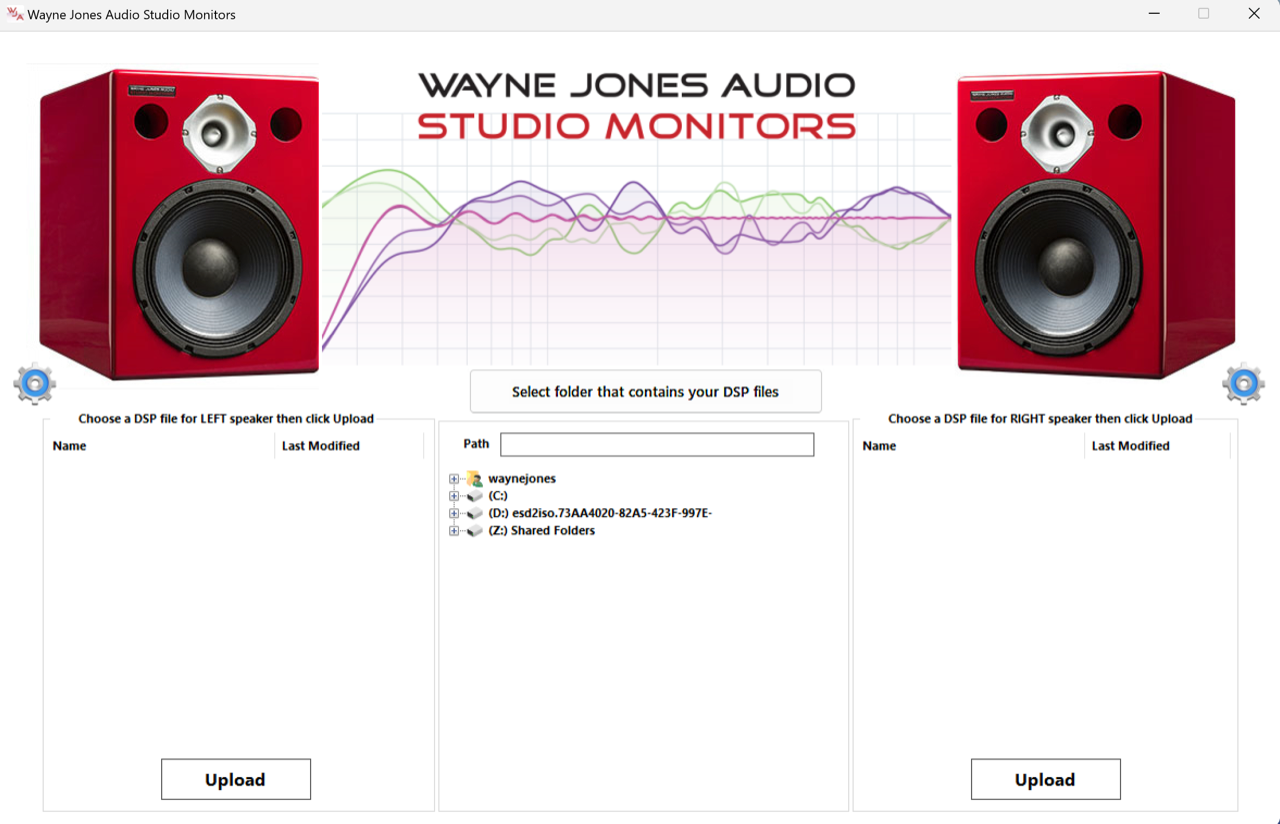
With the Left speaker powered on and all Room & HPF switches set to the center position (Input switch can be to the right for XLR, although it doesn’t matter where they are for the upload). Connect the USB cable from your computer to the USB input located on the control panel of the speaker. Suggest you start with Left speaker first.
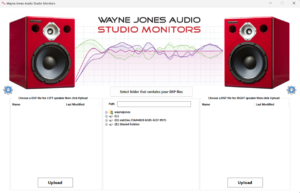
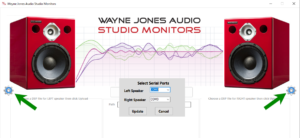 Open the app, select Com port
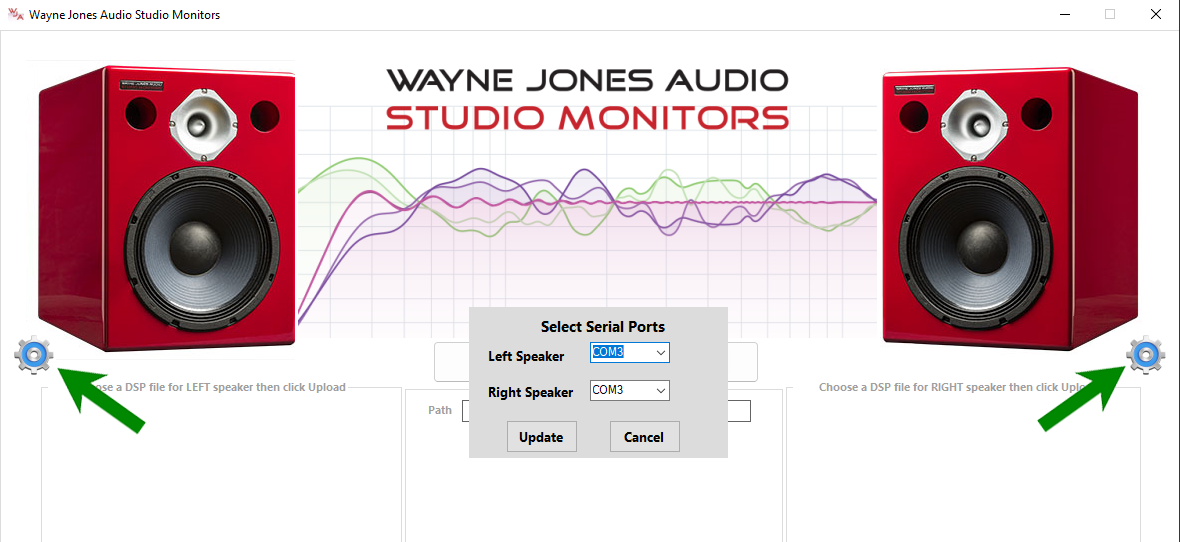
- Click on one of the cogs & select your COM port for connection
- Usually Com 3 but maybe 4 or otherwise depending on your computer
- Click update
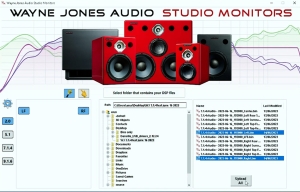
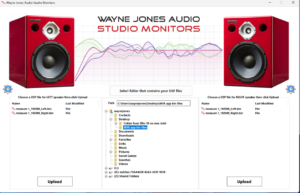 Folder
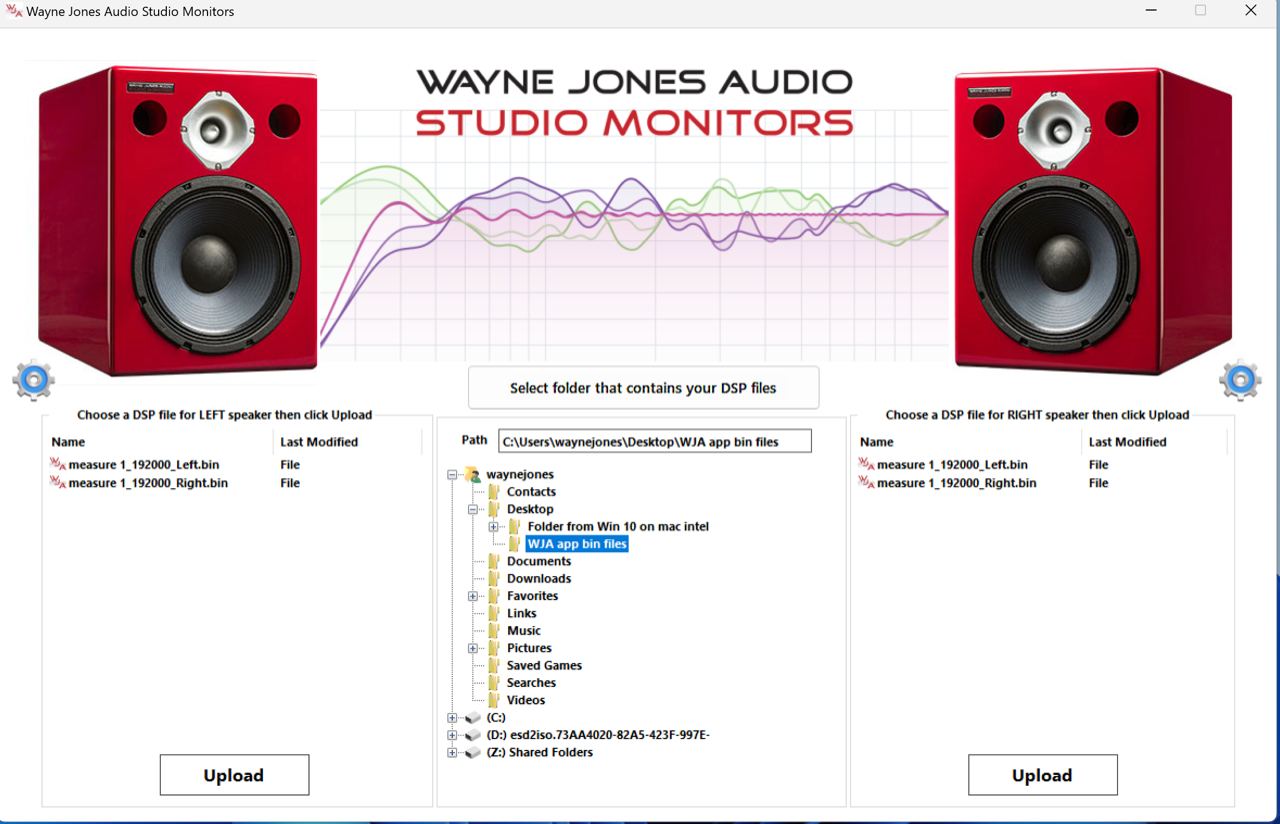
- In the middle column find the folder where you placed your bin files
- Click on that folder
- You will now see both Left & Right speaker columns populated with your bin files
Left Speaker upload
- For the Left speaker click the left speaker bin file
- Click upload & confirm
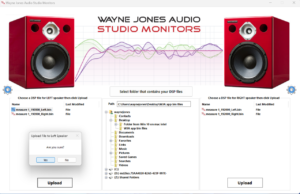 Please wait for the upload to fully complete & the upload progress box disappears

Note: If prior to uploading you get a failed to open port message, power cycle the speaker & or change the USB cable input on your computer.
- Power down the Left speaker, unplug the cable then power on again
- Position the center (Room 2) switch to Room 2. This is where you SoundID calibration file is stored & accessed
- The switch can be set to the center position at any time in operation to resume normal system flat response
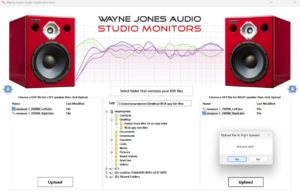 Right Speaker upload
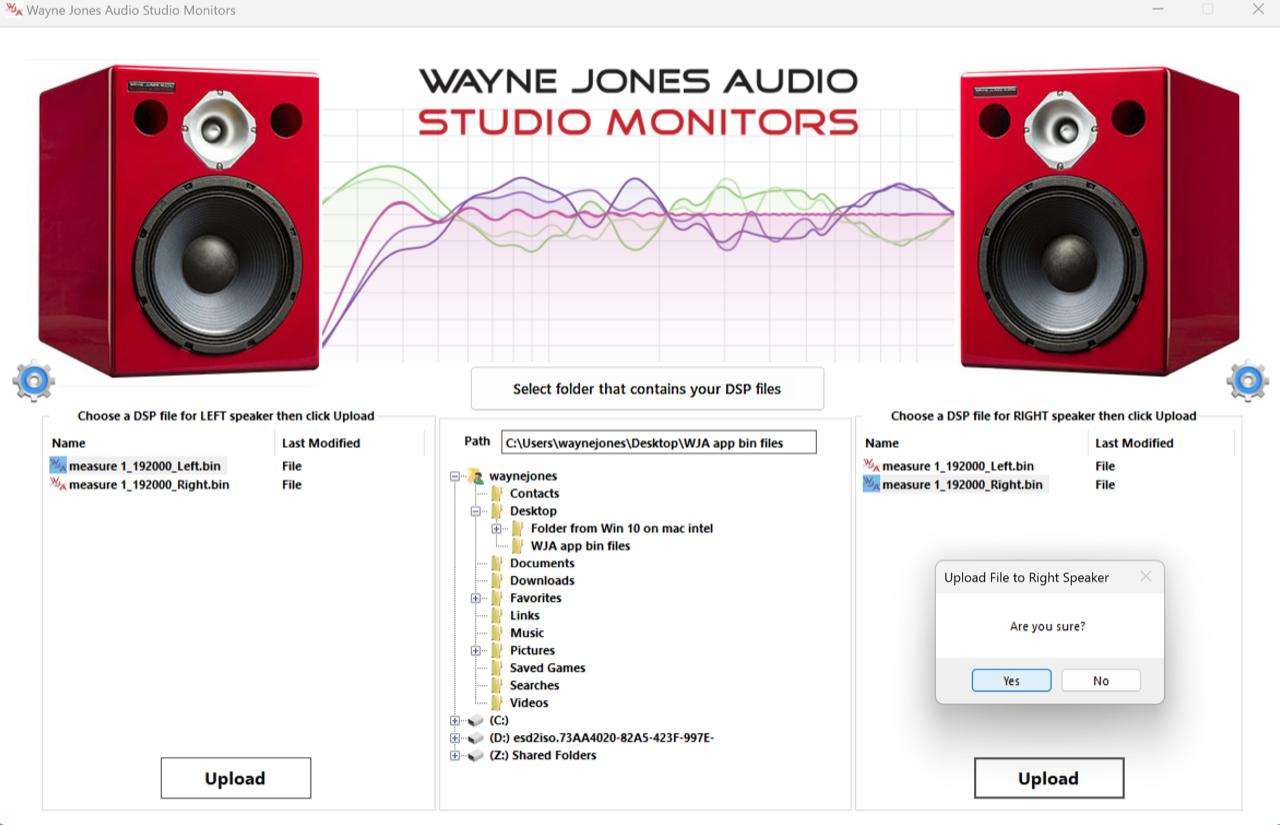
- Power on & connect the cable to the right speaker
- Go to the Right speaker column of the app, select the right speaker bin file & go through the upload process same as you did for Left speaker
Finished
These instructions are the same for uploading 2.0 up to 9.1.6 multichannel bin files (example provided is for 2.0)
Requirements:
- Wayne Jones Audio Studio Monitor models from 2023 with Ethernet port in control panel
- Windows based PC running up to & Including Windows 10 & 11 (You can also use an Intel Mac running Parallels.)
- Network switch with enough ports to connect your computer & speaker configuration
- Router
- Enough Cat 5E or Cat 6 Ethernet Cables for connection to your router, network switch, computer & speaker configuration
WJA SoundID Reference Upload App (Ethernet) Instructions
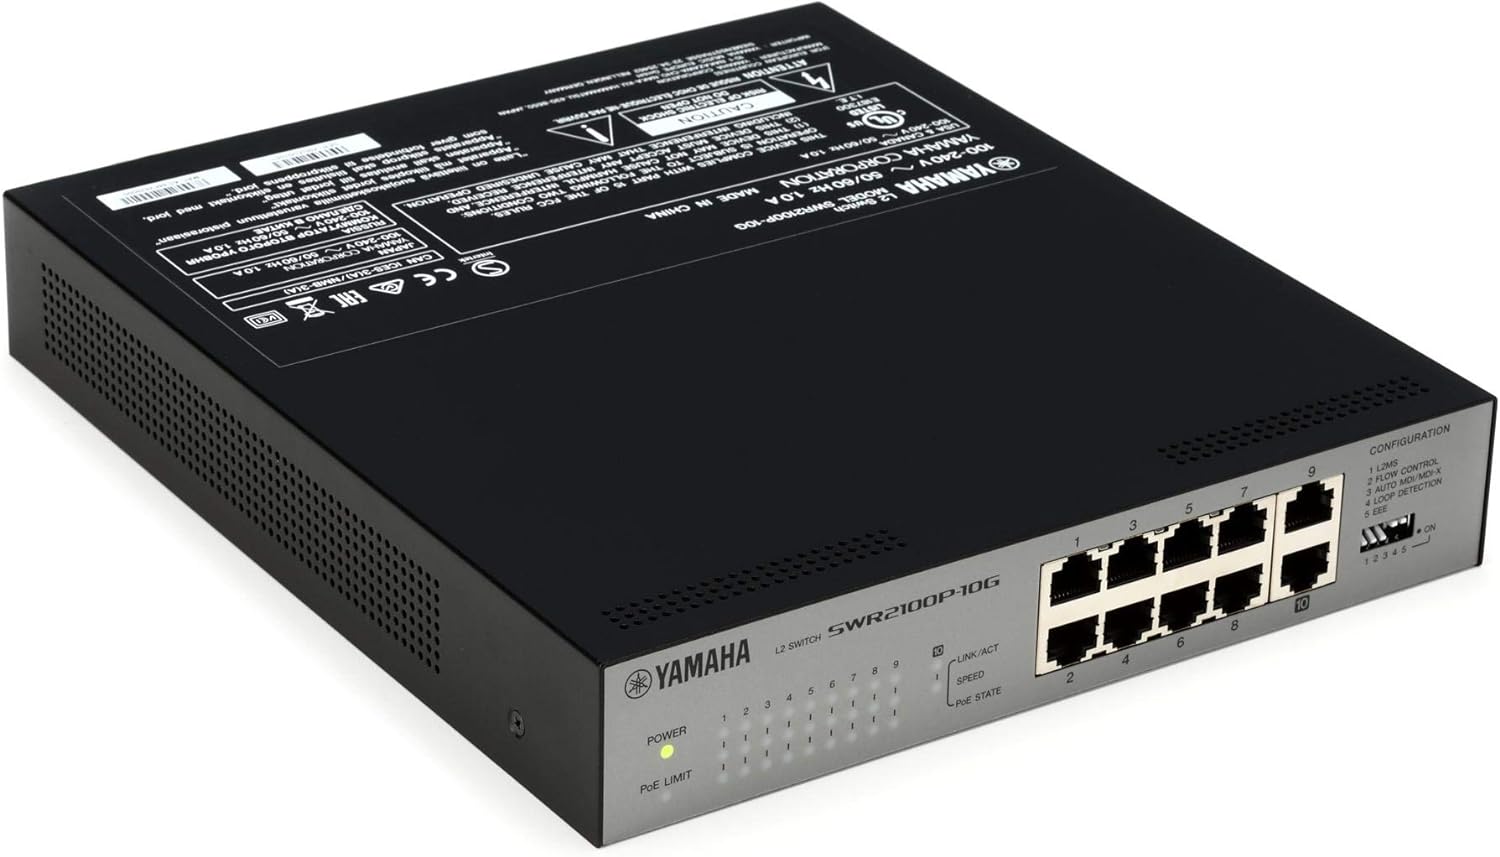
Yamaha SWR2100P-10G L2 Gigabit Network Switch
Contact Wayne Jones for a password to be able to download the app from the website:
Go to the website shop & download the WJA Ethernet App.
 Install the app on your Windows based computer
- Do not launch the app yet
- Using an Ethernet cable connect your router to the network switch
- For this connection we suggest keeping your router close to your network switch & use a shorter ethernet cable
- Connect the Ethernet cable from your computer to your network switch
- Connect all your speakers via the ethernet connector on the control panels to the network switch. Do not power on your speakers yet
- On the speaker control panels position all Room & HPF switches to the center position (Input switch can be to the right for XLR, although it doesn’t matter where they are for the upload)
- Power on your router
- Power on your network switch
- Open the WJA Ethernet app on your computer
- Lastly power on your speakers
 On The App

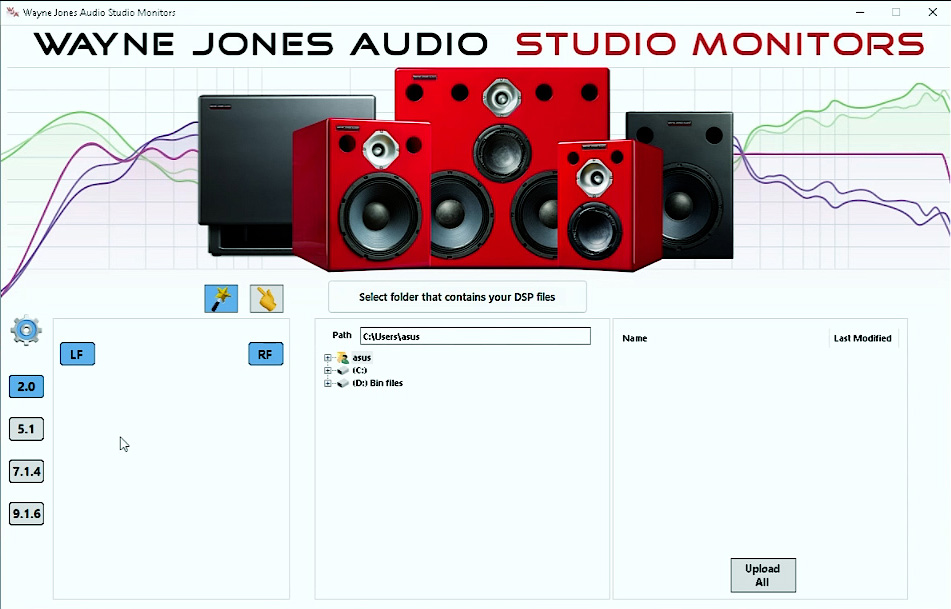
- Select your speaker configuration
- Automatic icon (wand) is selected by default
- Manual is the hand icon for uploading single files one at a time
- Click on the cog (network selection) wheel to the left on the app
- From the dropdown box select your speaker configuration
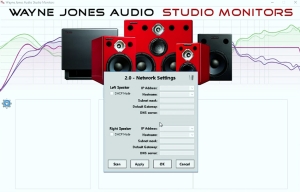
 A panel will appear with the unpopulated network details of your configuration
- Make sure the dropdown boxes appear empty & there are no previous scan results visible
- If so, click the trash can top right corner to clear all
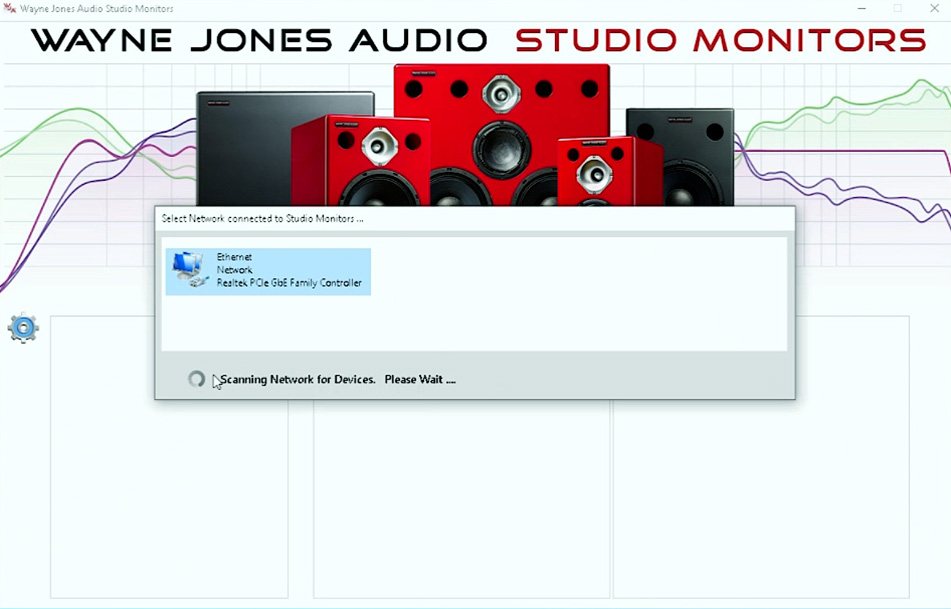
- Click Scan & your network should appear
- Click to highlight your network then click ok & wait until your speakers are discovered
 On completion a Network Settings panel will appear
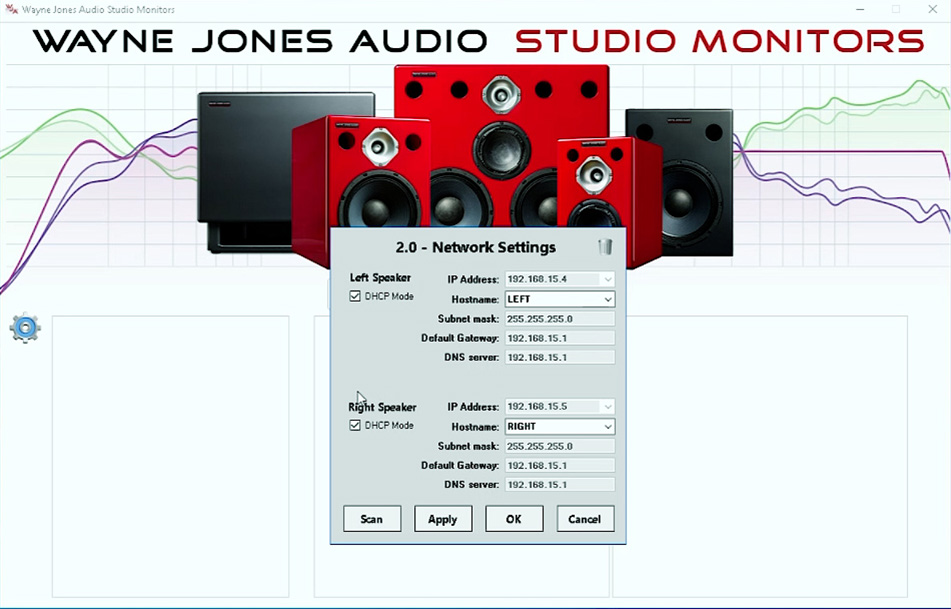
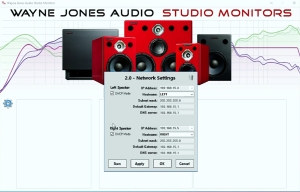
- Click the empty IP Address dropdown box for the left speaker & 2 IP addresses will appear. (For 2.0)
- Chose the one that is for your left speaker (usually the first one)
- Do the same for the right speaker (only one IP address will be visible here as you have already assigned the other to the left speaker
- You can also replace the said IP address later with a host name such as Left or Right for ease of identification (see video for e.g.)
- Click Apply, then click OK
- The panel will close.
Next
 Find your SoundID Reference bin files
- Go to the centre column to find where you have stored your SoundID Reference saved measurement files (bin files)
- Click on the file folder & your files will appear in the far-right column of the app
- Finally click “Upload All” – (will upload your highlighted files)
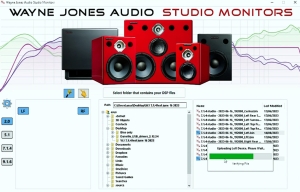
- Confirm you are sure & the uploading will start for all speakers
- Please wait until the uploading for all speakers is complete
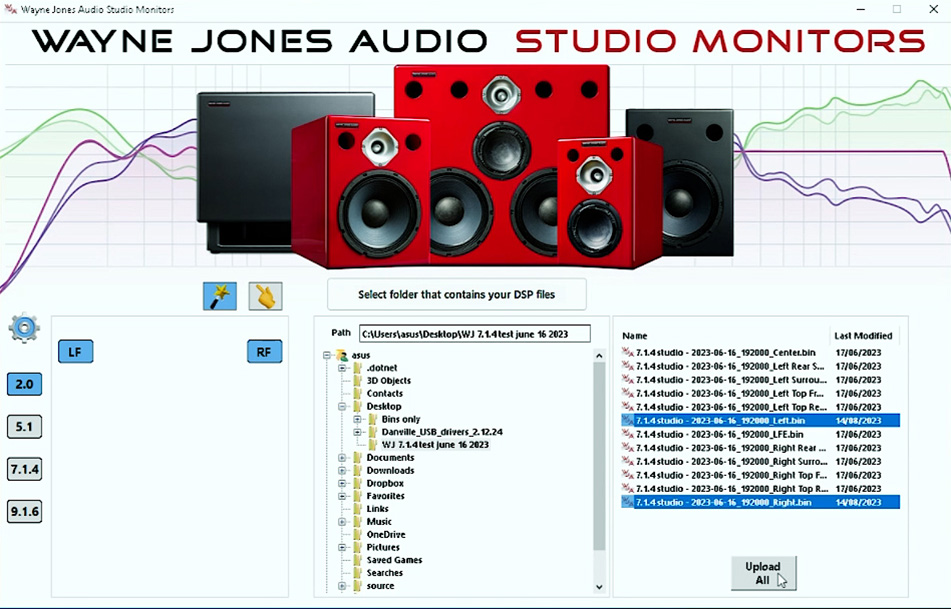
 !! Essential. Do not interrupt the upload at any time as there is a possibility it may brick the DSP boards !!

Finished
- On the control panels of your speakers position the Room switches to Room 2 (to the right as you face the speaker)
- This is where you calibration resides.
- You can now disconnect everything
Complete
Now enjoy the amazing sound reproduction brought to you by Wayne Jones Audio Studio Monitors & SoundID Reference from Sonarworks
Resources & Wayne Jones Audio Studio Monitors Product Information
How to export a Sonarworks SoundID Reference room measurement profile for Wayne Jones Audio Studio Monitors.
WJA SoundID Reference Upload App (USB) Instructions
WJA SoundID Reference Upload App (Ethernet) Instructions
- Wayne Jones Audio Studio Monitors
- Wayne Jones Audio Studio Monitors: a new level of innovation together with SoundID Reference from Sonarworks
WAYNE JONES AUDIO STUDIO MONITORS with integrated SoundID Reference - Purchase SoundID Reference from Sonarworks